Reverting back to the Classic Editor in the latest edition of WordPress
One of the most ill-advised updates in WordPress history came this past week in the form of WordPress version 5.0. The latest iteration of the software has ditched the traditional, or “classic” editor we’re familiar with in lieu of a new “block style” layout editor named “Gutenberg”.
In short, Gutenberg replaces the previous classic editor which has existed within WordPress for over ten years. It’s a modern rethinking of the entire publishing interface, however, that’s not always a good thing.
After playing with Gutenberg for several months (as WordPress announced its arrival would come some time ago) I started seeing that some custom functions I developed for clients of mine had disappeared. On top of that, copy and pasting content from other sources, and then editing said content, had become laborious.
It appears I’m not alone in this thinking, as the official WordPress plugin repository tells the whole tale:
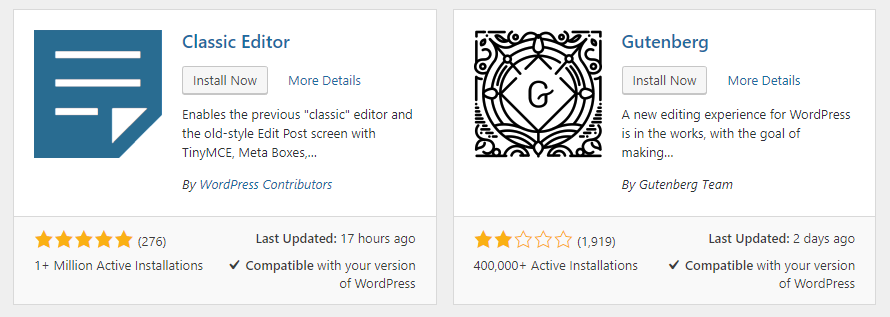
Gutenberg is the default editor in the latest version of WordPress and doesn’t have to be installed, so the 400,000 active installation statistic is a bit misleading. However, the over one million active installations for the Classic Editor is not: the number continues to climb by hundreds of thousands daily, as WordPress users and developers reject the new block layout style of Gutenberg (illustrated by the over 1,900 reviews, currently at 2-stars as of this writing).
If you’re one of those users stuck in a rut with the new editor, not all is lost. You can use one of the following two methods, outlined below, to restore the Classic Editor as a plugin. Doing so will also revert some of the elements Gutenberg hides or breaks in the latest edition of WordPress.
According to the official plugin repository:
Classic Editor is an official plugin maintained by the WordPress team that restores the previous (“classic”) WordPress editor and the “Edit Post” screen. It makes it possible to use plugins that extend that screen, add old-style meta boxes, or otherwise depend on the previous editor. By default, this plugin hides all functionality available in the new Block Editor (“Gutenberg”).
The official link also notes that support for the Classic Editor will be maintained until at least 2022: a good sign for those of us fighting with compatibility issues within it’s replacement.
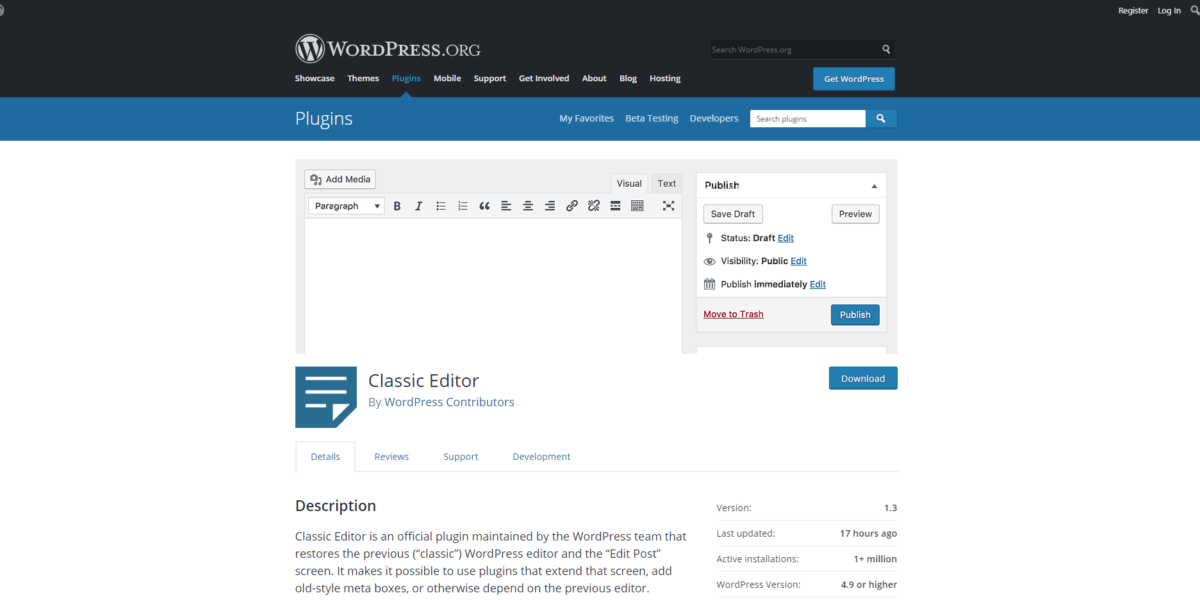
If this sounds like something you wanted yesterday, here’s how you can go back to the way things were by installing the official Classic Editor WordPress plugin.
Add New Plugin
If you click on the Plugins link on the sidebar menu within the WordPress admin area, you will arrive to a screen listing all of your installed plugins. A button at the top of the page gives you the ability to “Add New” and that’s precisely what we want to do. Clicking the “Add New” button will take you to the next screen, where you can directly install a plugin by searching for it, or you can upload a plugin you previously downloaded to your machine.
Direct Install
Currently, the Classic Editor is one of the most popular plugins in the WordPress repository and should show up on the main “add plugin” screen without searching for it. Should it not be on your screen here, a search box to the top right of the page will help you track it down.
Simply type in “Classic Editor” and you should see several search results. Look for the correct plugin (as pictured above) and click on the “Install Now” button.
In a few moments the plugin will install on your WordPress site, but you’re not finished yet: you must then click on the “Activate” button which takes the “Install Now” button’s place in order to apply changes and restore the Classic Editor over Gutenberg.
Upload Manually
If for some reason you cannot directly install the Classic Editor, another option is to download the Classic Editor as a zip file from the WordPress plugin repository. Start by downloading the file from this link: https://wordpress.org/plugins/classic-editor/.
Next, visit the same plugins section, as noted above, by clicking on the relevant “plugins” link on the sidebar while logged into the WordPress dashboard. You will arrive at the page listing all of your installed plugins. Just like the direct install method, you want to click on the “Add New” button at the top, but this time you will click on another button in nearly the same spot on the next page, “Upload Plugin” and then choose the zip file you saved from the step above.
In moments you will see that the plugin has installed and you will be given an option to activate it. Don’t forget to do this, as the inactive plugin won’t get rid of the Gutenberg “experience”!
Conclusion
It’s easy to see that WordPress users are initially rejecting Gutenberg due to the lack of a traditional word processing experience. Computer, and even smartphone users, have grown accustomed to a traditional toolbar and return lines (headers, paragraphs, etc.) as commonly found in programs such as Microsoft Word, social media apps, and just about any email provider or software on the planet.
The new Gutenberg experience attempts to make block layout easier for the Average Joe, as advanced web designs required knowledge of HTML and CSS in the past. However, Gutenberg makes this change by eliminating a traditional writing experience which has been around since the dawn of personal computing.
In addition, those of us (like myself) who have hand coded custom WordPress themes and functions for advanced designs, are finding that our work is broken by the Gutenberg editor: making it more difficult for users and clients to update their sites or breaking functionality altogether.
If you find yourself in either camp as someone who wants the classic writing layout or you can’t find custom meta boxes and features you once had while editing your website, then a return to the Classic Editor is just the fix you need to get right back on track!
3 Basic building blocks for any new website
For many of you out there, you’re considering getting into the world of content marketing but you’re not quite there yet. Nearly everything I’ve published on my blog and podcast to date has catered to those who already have an established website.
However, I realize there’s a segment of you out there that are starting from scratch. You’re wondering, “How do I start a blog or podcast?”
In this article I’ll go over three basic building blocks you will need in order to successfully start marketing with digital media.
Note: this article contains affiliate links to services where I may earn a commission.
Domain Name
You’ve seen commercials for GoDaddy before: but what is GoDaddy?
It’s one of several reputable domain registrars on the Internet. In layman’s terms, it’s a place you go to buy your dotcom name. (Another well known registrar is Network Solutions.)
When I jump to the next step below, you may say to yourself “Well this place is going to give me a domain name for free.”
Don’t do it!
You don’t want to your domain tied to a service you may have to move from. Imagine not being able to move your money from one bank to another: where your domain is parked is just as important. I’ve seen clients who have had their domains held hostage for an obscene amount of money. Oftentimes those clients don’t want to pay the ransom and end up having to start all over after investing years of time and money into promoting their name.
Worse, Google may not get properly notified if you change your domain name. You will then fall off of whatever page you were on, should you have a website which ranked high in search.
Another buyer beware is the cheap registrar sites. Some of these are fly by night operations, which can be shutdown by a governing body such as ICANN, causing your web presence to disappear overnight. This is the worst-case scenario when purchasing a name; in the event of the ransom situation, you may at least have some legal recourse.
Therefore, don’t skimp on where you buy your name from. The few extra dollars saved isn’t worth it.
I wouldn’t sweat the details as to which variation of a domain name you buy. A .com, .net, or .info won’t rank you any lower than a vanity .tv name. Go with what best suits you.
Also, I don’t advocate buying an expensive name. Having “pizza.com” isn’t very important if your content marketing and SEO gets “joespizzaparlor.com” ranking highly. Save that money and pocket it for other marketing efforts, such as Facebook ads.
Website Hosting
After you secure a domain name, your next step is to find a reputable webhost. This is the place where all of your files are saved on the Internet. Your domain name will point to this server.
Reputable webhosts are important as well. In the past I’ve used GoDaddy, but their service has been bloated and overpriced. Often, they will attempt to sell you everything under the sun. A website builder for a few bucks may sound like a good idea, but it’s not.
Also consider some hosts have thousands upon thousands of websites served from the same box. That means if another website becomes popular overnight, it could impact your business’ online presence going down and being unavailable.
Getting hacked is also a big concern when choosing where your website rests. HostGator is a major online hosting discounter, but has also been the source of nearly all of my hacking headaches over the years. (Sorry HostGator, but it’s true!)
There are a number of other great webhosts I’ve worked with over the years, but DreamHost is my go-to service. In fact, I bypass their shared hosting (same issues with thousands of users noted above) and go directly to their VPS or “Virtual Private Server”. A VPS is a step up from a shared server, but differs as it dedicates a specific amount of resources for only your website.
Other hosting services offer a VPS, but nowhere near DreamHost’s cost, reliability and features. You won’t have to worry about bandwidth with their lowest tier plan, as it includes unlimited traffic. 30gb of storage space should be enough for most businesses unless you serve large files from your website.
If interested, you can sign up for a DreamHost VPN plan here.
I won’t lie: finding a good email provider at a great price is nearly impossible. Like domain names, many webhosts offer email as an included freebie to further incentivize purchasing their services.
This can get you by and in many cases is okay.
In other scenarios, the email can be crippled, go offline, or have wacky problems. Even DreamHost isn’t immune to these problems and it comes with the territory of “you get what you pay for”.
The good news is that DreamHost can incorporate a business Gmail account by the press of one button. Office 365 users can also configure settings to use their email platform as well.
Either business email platform is great. Each comes with different features you may want to compare for the cost. However, if those costs seem a bit high for a side business or hobby, there’s nothing wrong with using the freebie email on a trial basis. Sometimes the newer domain name may get you flagged as spam, but that’s a risk anywhere – unless you buy from the big boys. (They have a higher success rate delivering email based on being the largest providers on the planet.)
Regardless of your approach, your email is another online face of your company. What I don’t recommend doing is using a plain ol’ Gmail or Outlook account. Those have the same risk of being flagged as junk mail, plus they don’t give the impression that you’re a serious individual.
Having an address such as info@abccompany.com goes a long way toward positioning yourself as an expert in your niche.
My top things every website should have
You’ve heard a lot of tips for content marketing, but we need to go back to the hub of where those campaigns send people: your website!
If you have a poorly designed website, even the best campaigns will fall flat. To avoid leaving potential clients or customers in the dust, here are X things every website must have.
Contact Information
9 out of every ten website visitors come to your website for your address or phone number.
Okay, that’s a made-up statistic, but would you even want a single person to visit your site in order to speak with a human one-on-one and not be able to find the information?
Or, would you prefer someone searches on Google Maps for your business, but can’t find it because your site is lacking a physical address they can visit?
Believe it or not, I’ve experienced each of these things during my time as a web developer and social media manager. The number may have been fake, but why risk not having this information in an easy to find place on your website?
My recommendation:
Place this information in your footer. The phone number can be repeated in your header as necessary.
Contact Form
Continuing with my fake facts, 1 out of 10 people don’t want to talk to you in person. Maybe they don’t have time. Maybe they don’t have interpersonal skills. Whatever the reason might be, you need to provide a way for them to message you.
The best way to do it that is with a contact form. That’s because a hyperlinked email address will not only attract spam, but it also might not work if the end user (who could be technologically challenged) does not have a mail program setup on their computer or smartphone. (Or they’re using a public or shared device, i.e. at a library.)
My recommendation:
Create a separate “Contact” page on your website for this form. Make sure you also include your physical address and phone number where applicable but don’t use your email address: doing so will only get you a lot of spam inquiries and potentially cause you to miss a real one in the pile of spam mail messages.
Homepage Link
Don’t assume that everyone who visits your website instantly arrives on your homepage. Make sure you have a clear and easy to find home link in your navigation bar.
Many websites also link the company logo in the website’s header back to the homepage as well. That never hurts, as it’s expected behavior to click on that go to the homepage. However, you should also make sure it’s spelled out for less tech-savvy users who aren’t aware of standard web conventions.
About Page
If you don’t have a lot to say about yourself you may put this information on the homepage. In fact, it may be better there as a mission state or a brief blurb. “Less is more” in this case and having someone click on an About page to only read two sentences may give the wrong impression.
For everyone else who needs to list certifications, accomplishments, or your entire staff list, a full-fledged About page is necessary.
A Blog
If you don’t know why a blog is crucial to have on your website, then I have an entire article dedicated to telling you why one is! Click here to read Why every website on Earth needs a blog.
Social Media Links
Remember the lesson about your address and phone number? The same thing applies to social media. If you belong to a particular platform, then you must link to it! Make it as easy as possible for your visitors to find you. Remember, this is about building a relationship — and your content marketing platform. It’s more likely someone will return to your website after following a Facebook post or a tweet, then physically entering your web address or bookmarking your site to check on it daily. (Imagine if they had to do that with 100 profiles they were following!)
My recommendation:
Try to add these in the footer of your website, just like the phone number and address.
What are you waiting for?
These improvements to your website will not only make it easy for first-time visitors to get around, but it may also improve your search rankings. So, what are you waiting for? Get to it!
For an expanded version of this conversation give my content marketing podcast, The DisContent Show, a listen!